Client interface of Live chat
When a client has queries that require to be answered or doubts that need clarification, he can always log on to the client portal and connect with the company representatives. He can post a query which will be raised as a ticket on the staff portal and it will be assigned to a staff member who in turn will try to resolve it to the best of his knowledge. If the client is not satisfied with the solution provided, he can escalate the issue to the higher authority.
The company can also use Virtual Agent for query resolution. This virtual agent can be displayed on the client facing interface or any other company website for that matter. Using this virtual agent you can map your scripted questions with the scripted answers and help the client resolve their queries without human intervention from your side.
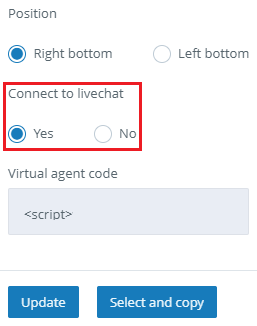
You can also decide to integrate your virtual agent with your live chat. Virtual agent helps automate your customer support whereas live chat enables you to connect with the client over chat and provide live support. To connect your virtual agent with your live chat, from your virtual agent settings you can select the option to enable this transition.
After you connect your virtual agent with your live chat, your clients can access the virtual agent first and if they are not completely satisfied with the solution provided or need further assistance, they will have the option to move over to live chat and get in touch with your company representative. At the bottom of the virtual agent, there is a review question where the clients are asked if using the virtual agent was helpful or not.
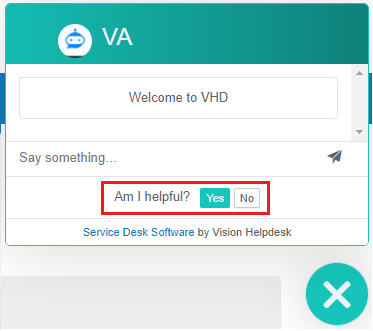
If the client clicks on ‘NO’ over here, the system suggests options such as:
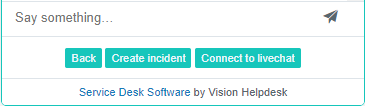
Back: The client can switch from the virtual agent to live chat and in the same way the client can choose to go back and continue to resolve his query using the virtual agent. The back option allows the user to switch back to virtual agent.
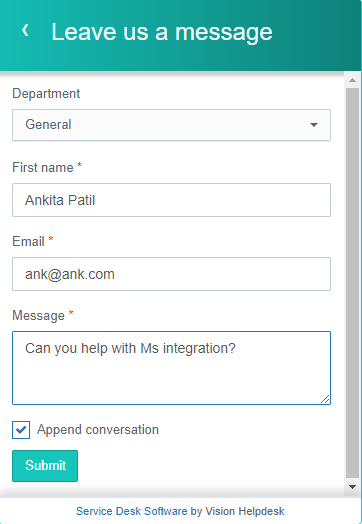
Create Incident: The client can choose to submit the query and create a new incident in the system. While creating an incident the client can also choose to append the conversation he has had with the virtual agent. In this way, the company representative who will be assigned the ticket will also get some additional information.
Connect to live chat: The option of connecting to live chat is only visible if any staff member is online and available to accept chat requests. When the client chooses to connect with the company representative over live chat, the live chat widget will be displayed. If you do not have a virtual agent connected with live chat, the client will directly see the live chat widget on the client portal. On this widget, the client will be able to see the names and profile photographs of your online staff/company representatives.
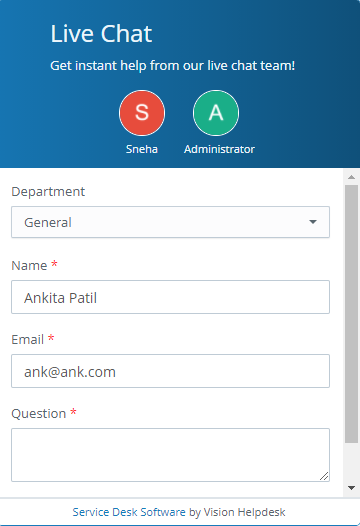
Prechat form:
A prechat form gathers all the prerequisite details of the client before initiating the chat. If you have enabled a prechat form from the staff portal, on accessing the live chat widget, the client will see a list of fields that require to be filled. These fields assist with collecting additional information about the client in order to resolve his queries efficiently.
Options in ongoing chat
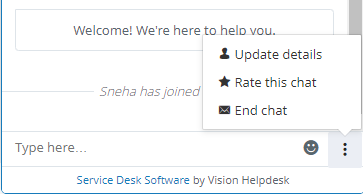
When a chat is initiated, the client can perform the following tasks:
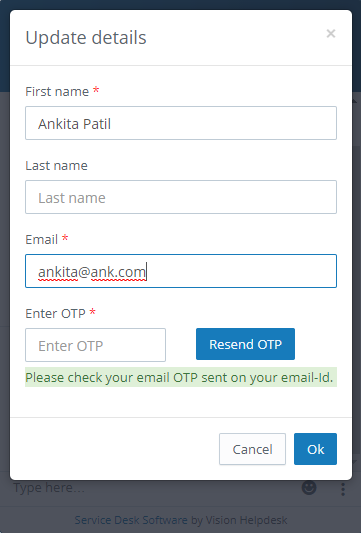
Update details: A prechat form collects the basic details of the client before the chat commences. These details are required for effective query resolution of the client. After the chat is initiated, the client can go back and update his details submitted on the prechat form. In this way they can modify the details and provide the staff proper information.
Rate this chat: The client may also give a rating based feedback to the chat. This rating can be star based or smiley based rating depending upon what you have set from the admin portal.
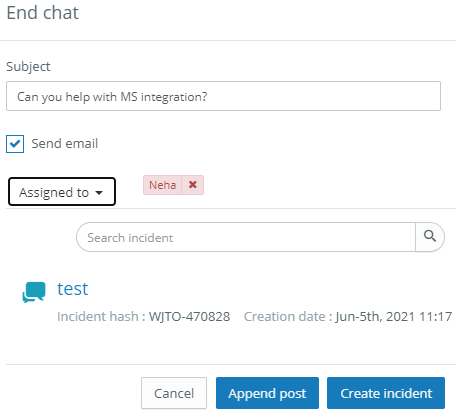
End chat: The client may choose to end the ongoing chat. When the client chooses to end the chat, the system will automatically create an incident and provide the client with some options. The client can also append the conversation to a ticket as a post. If the client has previously submitted a ticket in the system, the system will suggest it for appending the chat. The client may also choose to create a new incident altogether.
When the chat is ended and a ticket is generated in the system, the client can also receive a copy of the chat on his email address like an incident if you select to send email. You may also choose to append this conversation as a post to an incident submitted by this client previously.