

A Chat widget is like a little box installed in the corner of your website. It is a point of contact for your online visitors. It helps your customers to connect with your customer service representatives over a real time chat.
To configure your chat widget you will need to access the settings:
Admin Settings >> Live Chat >> Chat Widget
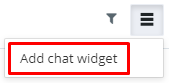
From the top right corner of the page, through the more list icon you can add a new chat widget. When you choose to add a new widget you will be asked to define the details for the working of the widget. A Chat widget is basically the chat application, which can be configured as below:
Domain: If you are using Satellite helpdesk or higher versions, you can choose the domain name before configuring the chat widget.
Title: Title of the live chat widget can be added here. This name will be displayed in the staff portal under the list of live chat widgets available.
Default Department: The live chat widget displays a default department to be displayed for the client and when the client initiates a chat, it will be automatically routed to the same department executives. For eg. you can state the default department as customer support and if the client requires to initiate a chat with executives from other departments, the client can choose from the drop down menu provided.
Default language: Vision Helpdesk provides support in multiple languages. So your clients who might be contacting you from different regions can toggle between the language of their choice. When you are enabling a language for the client facing portal, you can also choose to give live chat access. These live chat enabled languages will be displayed on the live chat widget and the client will be able to choose the language from the drop down menu. If the language is not selected, then the chat will be initiated in the default language unless the client chooses another.
Display title (Max 100 character): Let’s suppose you enable your live chat widget on your company website. The display title will be the name of the widget displayed on your website. For eg the display title can be your company name followed by ‘chat’ like Vision Chat.
Display sub title (Max 200 character): This sub text will be displayed on the live chat widget just below the display title or the name of the widget. For eg. It can be a message encouraging your customers to initiate a chat like ‘get in touch with our live chat team’.
Greetings message: This greeting message will be displayed on the live chat widget when the client initiates a chat. You can add a greetings message templates from the admin settings through: Administrator settings>>Live chat>>Message template
These templates can be displayed on the live chat widget as per your requirement.
Welcome message: As soon as the staff accepts an incoming chat request, an automated message can be displayed from the staff welcoming the client. This message is set from the staff's profile under chat setting.
Offline message: Once your staff logs in to the staff portal, they can enable their live chat status as ‘online’, i.e. open to taking new chats. If none of your customer support representatives are online, the offline message will be displayed on your live chat widget.
Display picture: You can add a display picture of your choice which will be displayed on the live chat widget. It can be your company logo or favicon icon.
Theme Color: Just like you can modify the theme colour of the staff and client facing portal from the admin settings, you can also modify the theme colour of the live chat widget. You can modify it to match your company website theme colour.
Prechat form: A prechat form will be displayed on the live chat widget when you enable this setting. This form is displayed on the chat widget and it will help you gather information about your client before you begin to provide him chat support. A prechat form can be customised as per your requirement based on the data you wish to capture from the client. It can be configured from: Administrator settings>>Live chat>>Pre chat custom field.
Show online staff bar: When you enable the setting to show the online staff bar over your live chat widget, you will find the name and profile image of your online staff members on the live chat widget. A maximum of 3 staff member details can be displayed on the widget which will be shuffled automatically. It gives a perception that there is a person in flesh and bones waiting on the other side to assist instead of a robot.
Show submit incident form if staff is offline: When you enable this setting, on the live chat widget you can also display a submit incident option through which your clients can submit you a new query, when your staff is offline on live chat. The client may also choose to append the conversation he has had with the virtual agent to this ticket.
Position: You can display this live chat widget on the bottom of the screen either on the left side or right side. In this way, the widget stays out of the way of the data which you wish to display on the web page yet it is close and accessible for your clients.
Add: Once you fill in the above options, you can click on “Add” to add the chat widget.