

Contract Management :
When two companies decide to conduct business with each other, a contract is created which specifies the relationship between both the companies and the set of terms through which they will fulfill their parts of the agreement.
An Organization can maintain contracts with vendors using Contract management module. Here, you can define the third party vendor details with whom you have the contract.
You can choose the contract type from the default types such as Maintenance, Lease, Software license or you can define the custom contract type from admin setting >> Assets >> Contract type.
Select the product for which you have the contract. Product drop down list would be populated once you add the product from Admin setting >> Assets >> Product catalog.
Product should be linked with the third party vendors for better accountability. When you select the product respective vendor name gets populated in the vendor drop down. These vendors and products are inter-dependent fields.
You can associate vendors while adding the contract, first you need to add the vendor details.
Go to admin setting >> Assets >> Vendor >> Click on menu bar on right most corner >> Select Add vendor.
Once you add the vendor you would see the drop down of vendor list under contract module.
Notification : Here, you can define the start and end date of the contract and Check the notification checkbox if you want to notify the concern person prior to contract expiration.
With the contract you get an option to attach a soft copy of contract document.
Contract Approval : Once you add all the details you can also take an approval from the concern person.
Approver could be Staff members who using Helpdesk or he could be CAB user.
CAB users would have restricted access rights, so they would be able to give approval on respective modules.
Linking Assets with Contract : Contracts can be linked with the Assets from asset profile.
To summarize, for better accountability and visibility you can add contracts with third party into Vision Helpdesk.
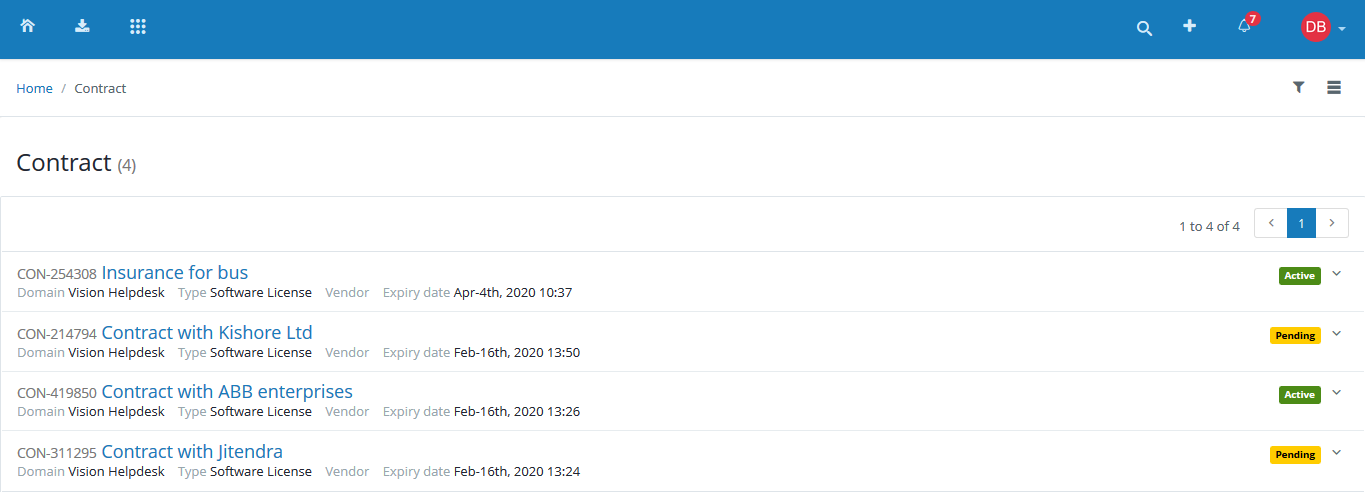
Contract Management Module
How to add Contract :
Go to Launcher icon on menu bar >> Select Contract module >> Click on menu bar on right most corner >> Add contract.

Status of Contract : Contract status can be Draft, Pending,Active and Expired. These statuses are visible under listed contract list.
Contract View : Once contract has been approved by the concern person, the status of the contract changes to Active and you would be able to view all the added details of the contract when you click on that particular contract.
Filter the contracts : Contract list can be filtered based on contract name, contract type, Vendors and expiry date.
To filter the contract list : Open contract module >> Right most corner is the filter icon >> add the details to filter
Edit or Delete Contract : You can delete the contract from the Contract list. On the right most corner of each listed contract there is small drop down to edit and delete the contract.
Note: Approved contracts can not be edited.
The below fields need to be filled while adding a contract.
Below is a screenshot of an added contract.
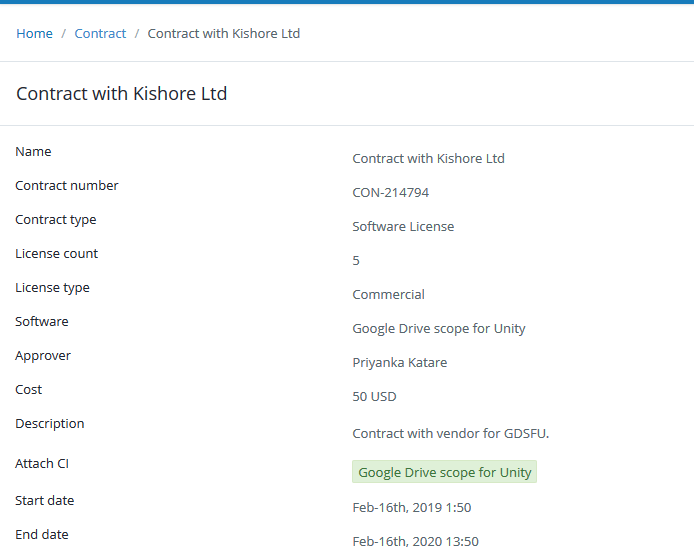
The contract can be linked to an asset (Attach CI option while adding a contract).

An Asset with a contract will include the details of the Vendor and keep the staff updated on the used and available stock. There is also an option to contact the vendor when the stock needs to be refilled.