

Domain
The license of this software is domain based i.e. it will only work on a valid domain name or website address that resolves over internet or intranet. It will not work on IP address or localhost.
The domain field in this section indicates the licensed domain you have registered while ordering the license.
There are certain restrictions like If you ordered license with domain name yourcompany.com you will be able to install the license on yourcompany.com/anyfolder, but you will not be able to install the license on support.yourcompany.com (because subdomain is treated as separate domain)
With Satellite helpdesk and Service desk you can add multiple domains and multiple customer portals. Help desk license has a single domain the one which is registered with the product.
Note: The main domain cannot be deleted or disabled. And when you delete the add-on domains then it will delete all the departments, Incidents and clients under that domain.
Path: Settings >> Module properties >> Domain
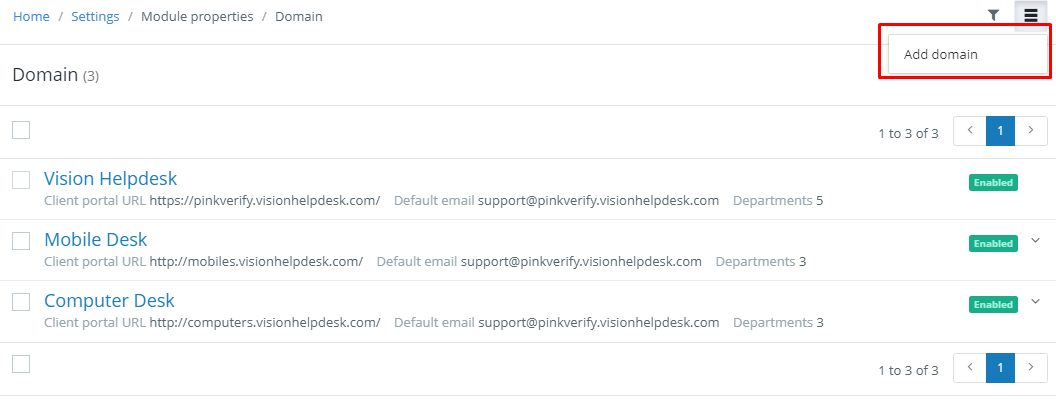
Add domains
Title: The display name of the domain or company or brand is to be specified here. The domain name which is specified will appear in the left panel in the Inbox and also in the browser titles.
Example - your organization name.
Domain: The domain should match with the licensed domain you chose while ordering Vision Helpdesk License.
Example if you purchased a license for domain yourcompany.com then you should enter yourcompany.com and if support. yourcompany.com then support. yourcompany.com in this field.
Note: If you enter the incorrect value - it will give you license domain invalid error and you will not be able to login to the staff portal.
Client portal URL: The URL for the client portal will be specified and created here. For different domains, there will be different client portal URLs.
Example: http://yourcompany.com/ or http://support.yourcompany.com/ depending upon your Vision Helpdesk installation URL.
Note: Please add URL ending with “/”
Default email: There will be default email for each of the domain which is used to send outgoing emails. If no email queues are set, then this email address will be used as from address for sending outgoing emails. It will be considered as default email for the respective domain.
Company address: This is an optional field. Address of the company should be specified here.
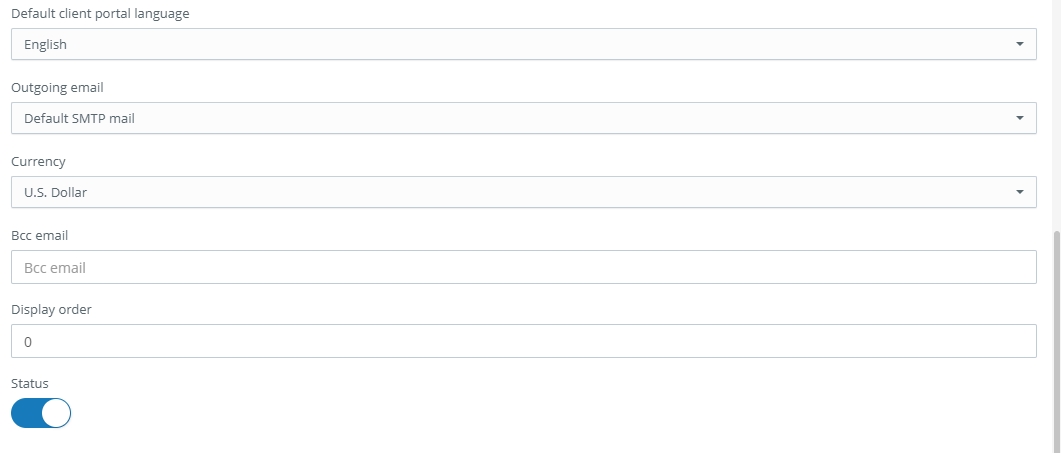
Default client portal language: This field will decide which language to be displayed on the customer portal as default when you have multiple languages added in the system.
Outgoing email: We allows you to send email and replies to Incident using any of the below options:
- Vision SMTP
- SMTP
Note: If you use SaaS then you can use Vision's default SMTP for sending outgoing emails and also you can set your own SMTP whereas if you are using Download license then you cannot use Vision's default SMTP and you need to configure your own SMTP.
Currency: The currency to be used for the particular domain is specified here. This will be used in the billing module.
BCC email: The email address mentioned here will receive a copy for every outgoing email.
Display order: If there are many domains available then sorting for the domain listing can be done from display order. Domains get sorted as per the display order of the domain specified.
Status: It is possible to enable or disable a particular domain. If any of the domains is disabled then it will not be used by the system.
Add: Once you click on add, the new domain will be added to the system.


Departments
The departments can be created and managed under the company or domain. Each domain can have a number of departments. In the left panel of the manage portal, one can see the tree-like structure that consists of Domain at the top followed by the departments.
Departments help us to organize Incidents(queries) in a proper manner. Also clustering or grouping the Incidents help us for better customer support since the incidents are aligned to respective staff members. You can say departments work just similar to folders.
Further, you can have Status per department which gives you a count of Incidents for a respective status like open, awaiting, close.
Also, you may require additional properties related to Incident like the priority, Incident category, type, subtype which can be added as per your requirement.
Path: Settings >> Module Properties >> Department

Steps to add department
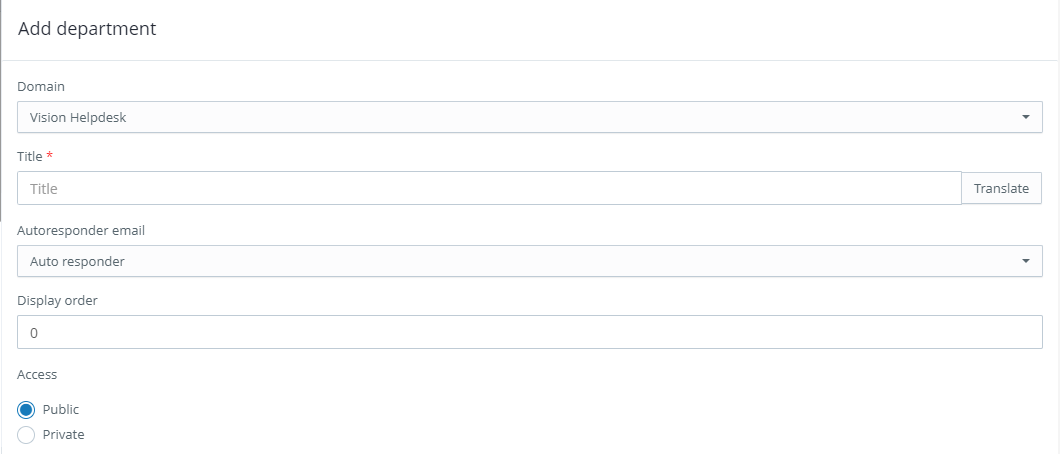
Add department:
Domain: Domain for which the particular department is to be added is to be selected from the drop-down (In case of Satellite and Service desk you will get the option of Domain selection)
Title: The name of the department is to be specified here.
Autoresponder email: You can select the template for autoresponder and mail will be sent to the client whenever an Incident is submitted for the particular department. Autoresponder will contain the Incident hash and client login details. It is possible to change the text of the autoresponder from email templates section.
Display order: If there are many departments available then sorting for the department listing can be done from display order. Departments get sorted as per the display order of the domain specified.
Access: The access to the particular department can be either public or private.
- Public: Public department will be visible to the client on the client portal and also to the staff in the manage portal.
- Private: Private department will be accessible only to the staff in the manage portal. It won’t be visible to the clients in the client portal.
Billing Method: You can specify if the department is free i.e. credit is not required to submit an Incident or postpaid i.e if you want to bill client after they submit Incident or prepaid in case you want to bill your client before they can submit an Incident to a specific department.
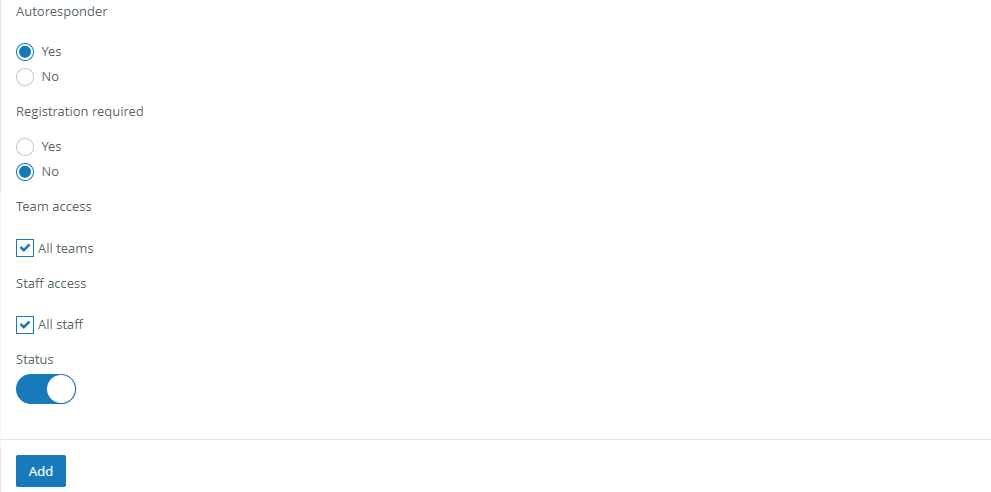
Autoresponder: You can select “Yes” if you want to send autoresponder for this department. You can select the template for autoresponder from “Autoresponder email”.
Registration required: If department registration is set as “yes” then the client needs to register before submitting an Incident from the client portal. If the option is set as “no” then the client will be able to submit an Incident without registration.
Team access: Defines which team has access to this department. All the staff members belonging to the selected team will be able to view Incidents under this department when they log in to the staff portal.
Staff access: Defines which staff has access to this department. The staff selected here means the staff can view Incidents under this department when they log in to the staff portal.
Status: The status of a particular department can be enabled and disabled from here.
Add: Once you click on add, the new department will be added to the system.
Status: Status are used to organize Incidents under each department which makes it easy for the management and categorization of Incidents. Status helps us to define the life cycle of an Incident.
Example New Incident, awaiting for client response, resolved and closed.
By default, when a ticket comes to system it is considered as "Open" status. There are four status and you can edit the existing status or you can add your own status.
If ticket status is Closed/Resolved it is considered as the solved ticket.
The default status are open, awaiting, resolved and closed. Out of these statuses, only awaiting can be disabled, rest can only be edited.
Path: Settings >> Module settings >> Status

Mass Action on Status:
It is possible to select either of the Status or more than one Statuses with the help of checklist and perform the desired action on them. The ticket statuses can be either enabled or disabled.
Any Status can be deleted using the delete option except the default status.
Apply Filter:
Filter list is used to provide more efficient and effective searches.
You can filter based on title and enabled or disabled option.
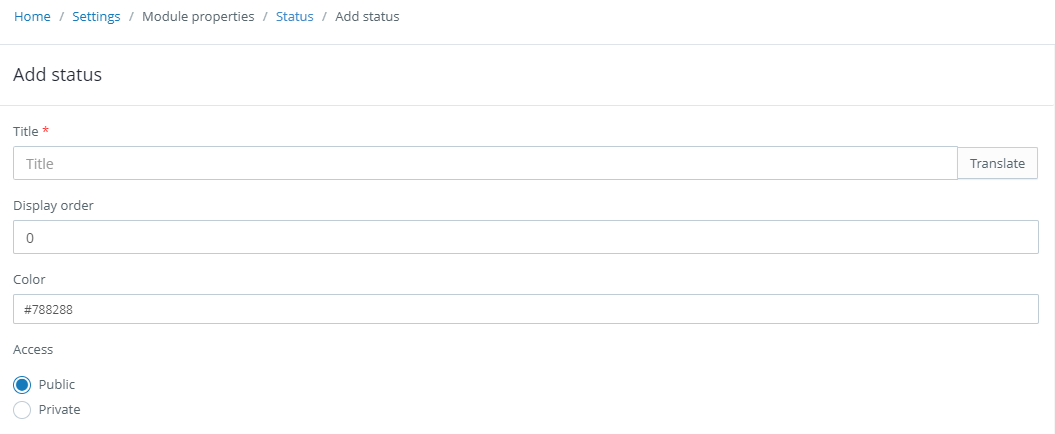
Add status
Title: The name of the status should be specified here.
Display order: If there are many Incident status available then sorting for the status listing can be done from display order. Status gets sorted as per the display order of the status specified.
Color: You can select any color for the title of the status.
Access: There are two types of accesses that can be assigned for the particular status:
- Public: When public access is selected then it will be visible to both staff and the clients.
- Private: When private access is selected then it will be visible only to the staff members.
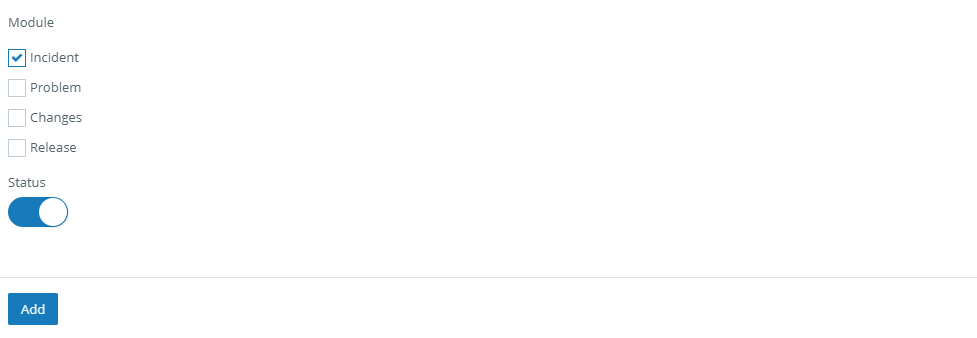
Module access: It consists of the module that will have access to the particular Incident status. More than one modules can be selected.
Status: It is possible to enable or disable a particular Incident status. If any of the Incident status is disabled then it will not be used by the system.
Add: Once you click on add, the new department will be added to the system.

Priority
All Incidents are not similar in nature as some may be an urgent issue, another may be a FAQ or a simple query about the product.
So, Priorities can help customers as well as staff to identify the Incidents urgency based on its “Priority”.
We can also have SLA based on priorities defined for Incidents.
By default, there are four priorities low, medium, high, critical. The low priority cannot be deleted or disabled but you can rename it, rest can be deleted or disabled.
Also, you can edit the existing priority or you add the new priority.
Path: Settings>>Module Properties >>Priority
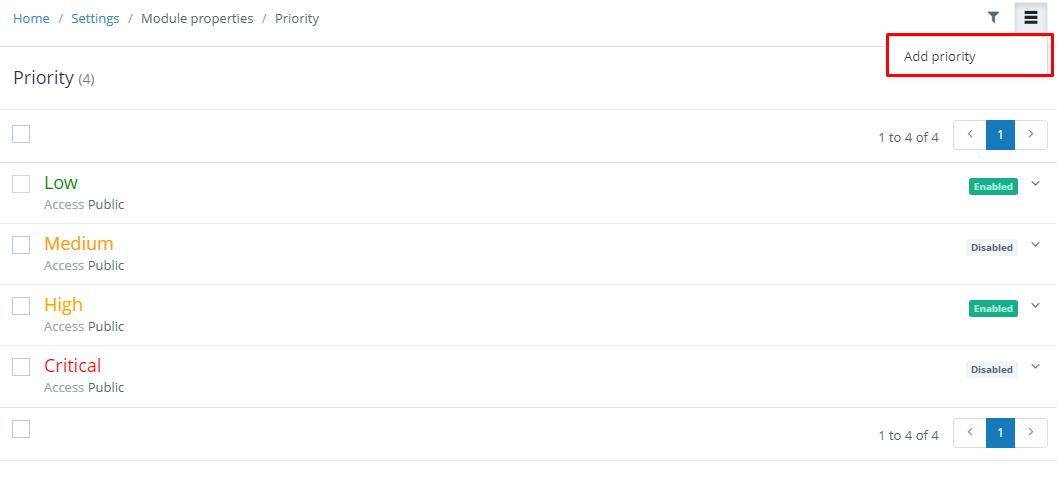
Add priority
Title: The name of the priority should be specified here.
Display order: Priorities get sorted as per the display order in the drop-down list.
Color: Here you can select the color for the priority you are adding.
Access: There are two types of accesses that can be assigned for the particular Incident priority:
- Public: It is visible to the clients as well as the staff members.
- Private: It is visible only to the staff members.
Module access: It consists of the module that will have access to the particular Incident priority. More than one modules can be selected.
Status: It is possible to enable or disable a particular Incident priority. If the particular Incident priority is disabled then it will not be used by the system.
Add: Once you click on add, the new priority will be added to the system.

Incident type
Incident type helps the staff as well as clients to define what the Incident is all about.
Using Incident type, you can channelize Incidents efficiently in the helpdesk.
Example Incident can be issue, bug or a simple query
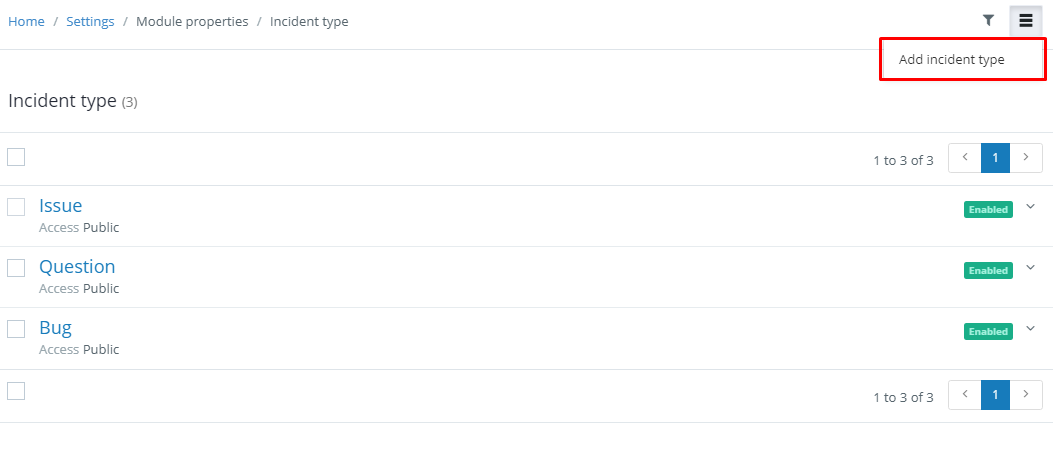
Note: By default, there are three Incident types:
- Issue – If there is some problem then you can select Incident type as Issue.
Example - Unable to Login to the portal
- Question – If you have any query or doubt then you can select Incident type as Question.
Example – What is pricing for the helpdesk.
- Bug – If you find any unexpected behavior in the system then you can select Incident type as Bug.
Example – Send email button not working.
Issue Incident type cannot be disabled but you can rename it.
Path: Settings>>Module Properties>> Incident type.
Mass Action on Incident type: It is possible to select either of the Incident type or more than one Incident types with the help of checklist and perform the desired action on them. The Incident types can be either enabled or disabled.
Any Incident type can be deleted using the delete option except the default ticket types or the ticket type which is already assigned to any of the tickets.
Apply filter: You can apply a filter based on the title and enable or disable the status field.
Add Incident type:
Title: The name of the Incident type should be specified here.
Display order: If there are many Incident types available then sorting for the type listing can be done from display order. Incident types get sorted as per the display order of the type specified.
Access: There are two types of accesses that can be assigned for the Incident types:
- Public: When public access is selected then it will be visible to both staff and the clients.
- Private: When private access is selected then it will be visible only to the staff members.
Module access: It consists of the module that will have access to the particular Incident type. More than one modules can be selected.
Status: It is possible to enable or disable a particular Incident type. If any of the Incident types is disabled then it will not be visible in the drop-down list.

Incident category
The incident category can help you to group, auto-assign Incidents based on the category they belong to like Hardware, Software, Service, etc.
Note: You can enable Incident category, sub-category and item for Manage portal and Client portal from Settings/Module/Incident/Incident Category, sub-category and item.
Path: Settings >> Module Properties >> Categories
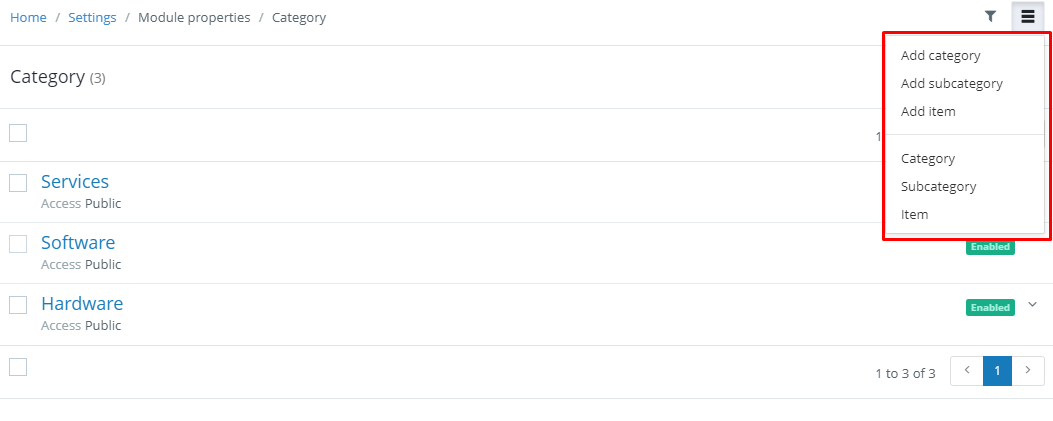
By default, there are two Incident categories:
- Software: If the Incident is related to Software then you can select this category.
- Hardware: If the Incident is related to Hardware then you can select this category.
Software Incident category cannot be disabled or deleted but you can edit it.
Add Incident Category
Title: The name of the type should be specified here.
Access: There are two types of accesses that can be assigned for the particular Incident category:
- Public: When public access is selected then it will be visible to both staff and the clients.
- Private: When private access is selected then it will be visible only to the staff members.
Display order: If there are many Incident categories available then sorting for the type listing can be done from display order. Incident category gets sorted as per the display order of the type specified.
Module access: It consists of the module that will have access to the particular Incident category. More than one modules can be selected.
Status: It is possible to enable or disable a particular Incident category. If any of the Incident categories is disabled then it will not be used by the system.
Add: Once you click on add, the new department will be added to the system.


Incident Sub-category
Incident Subcategory can help you to add subcategories to the main categories.
For eg: Let suppose you are having a category as “Software” and you want to add a subcategory as “Microsoft”.
Add Incident Sub-Category:
Title: The name of the type(Microsoft) should be specified here.
Access: There are two types of accesses that can be assigned for the particular Incident category:
- Public: When public access is selected then it will be visible to both staff and the clients.
- Private: When private access is selected then it will be visible only to the staff members.
Category: Here you can select the category (Here it will be Software) for which you want to add the sub-category(Microsoft).
Display order: If there are many Incident categories available then sorting for the type listing can be done from display order. Incident category gets sorted as per the display order of the type specified.
Status: It is possible to enable or disable a particular Incident category. If any of the Incident categories is disabled then it will not be used by the system.
Add: Once you click on add, the new department will be added to the system.

Add Item:
Title: The name of the type(say “Powerpoint”) should be specified here.
Access: There are two types of accesses that can be assigned for the particular Incident category:
- Public: When public access is selected then it will be visible to both staff and the clients.
- Private: When private access is selected then it will be visible only to the staff members.
Sub-Category: Here you can select the sub-category(Microsoft) for which you want to add the item.
Display order: If there are many Incident categories available then sorting for the type listing can be done from display order. Incident category gets sorted as per the display order of the type specified.
Status: It is possible to enable or disable a particular Incident category. If any of the Incident categories is disabled then it will not be used by the system.
Add: Once you click on add, the new department will be added to the system.

Level
Level can help to add an additional way of filtration for Incidents.
Let say you have a Level 1 team who looks after basic customer queries, Level 2 which looks after basic + low-level technical queries and then comes Level 3 which looks after all technical queries.
So, having level field will help you in identifying Incident nature and in allotment to the right team.
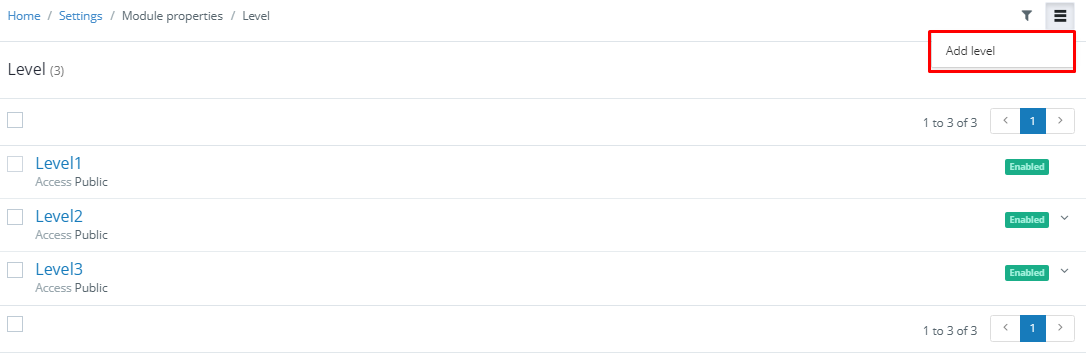
There are three default level provided by this system:
- Level 1.
- Level 2.
- Level 3.
Level 1 cannot be disabled or deleted but you rename it.
Path: Settings>>Module Properties >> Level field
Mass Action on Level:
It is possible to select either of the Level or more than one Levels with the help of checklist and perform the desired action on them. The Levels can be either enabled or disabled.
Any Status can be deleted using the delete option except the default Level.
Apply Filter:
The filter list is used to provide more efficient and effective searches.
You can filter based on the title and enabled or disabled option.
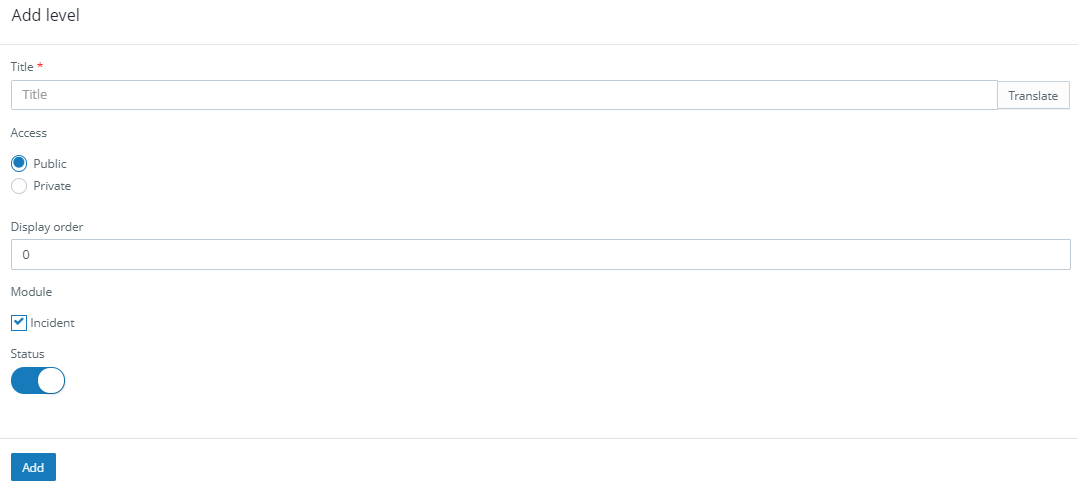
Add Incident level
Title: The name of the type should be specified here.
Access: There are two types of accesses that can be assigned for the particular Level:
- Public: When public access is selected then it will be visible to both staff and the clients.
- Private: When private access is selected then it will be visible only to the staff members.
Display order: If you have created multiple levels then those get sorted as per the display order specified.
Module access: It consists of the module that will have access to the particular Incident level. More than one modules can be selected.
Status: It is possible to enable or disable a particular Incident level. If any of the Incident levels is disabled then it will not be used by the system.
Channels
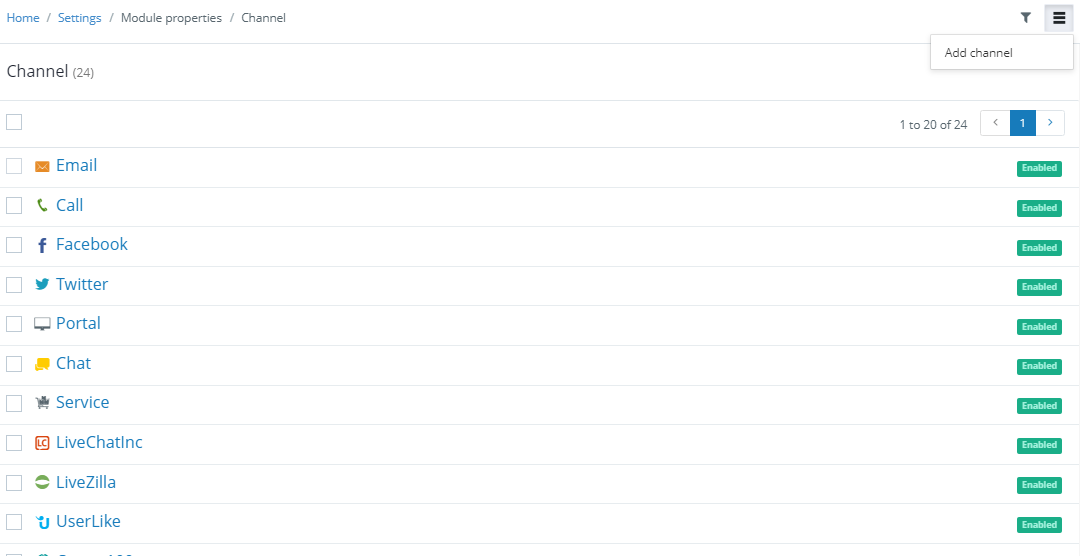
Channels are the different mediums which will provide flexibility to customers to select the medium using which they can communicate their issues with the helpdesk team.
Example Email, Call, Social networking sites, client portal, etc.
Note: All the channels provided by this system are default i.e., it cannot be updated; you can just make it enable or disable according to your choice.
Email Channel cannot be disabled. In case of the remaining given channels if they are not in the use then they can be disabled but cannot be deleted.
Path: Settings >> Module Properties >> Channel.
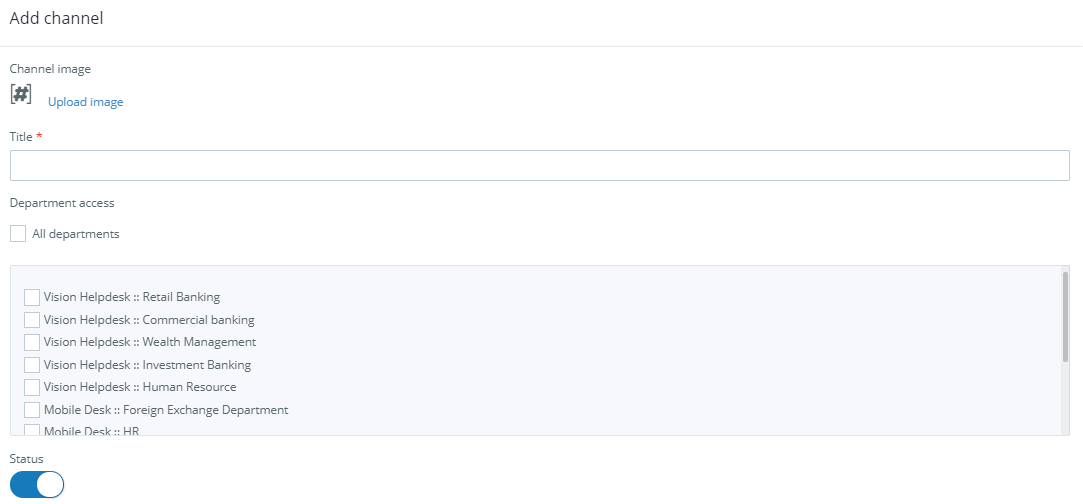
Add channels
Channel image: The image for the channel can be uploaded from here.
Title: The title for the particular channel can be added from here.
Department access: It consists of departments that will have access to particular channels.
More than one department can be selected at a time. It is also possible to select all the departments using all departments option.
Status: A particular channel can be enabled or disabled from here.
Labels
Label is used as an additional attribute and filtration criteria for Incidents. The Incidents can be filtered quickly using them. It is possible to add a number of labels for the Incident.
Also, you can add a different color to labels.
Example You can add a label as Important, Urgent, Paid, etc.
Note: Important label cannot be disabled or deleted but you can edit it.
Path: Settings >> Module Properties >> Labels
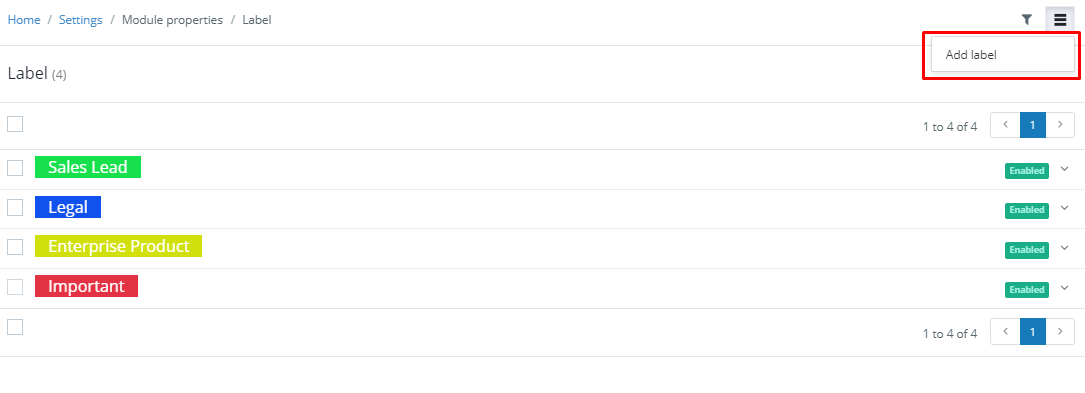
Add label
Title: The name of the label should be specified here.
Label color: The color for the given label can be set from here.
Display order: If there are many labels available then sorting for the label listing can be done from display order. Labels get sorted as per the display order of the labels specified.
Department access: Here you can add department access for this label if you want to allow or restrict any department.
Visible to left panel: In inbox left panel you can view the folders with the label view if it is enabled.
Status: A particular label can be enabled or disabled from here.

Flag
Incident flags act as a mark of attention for the quick alerts. The Incident can be treated accordingly depending upon the color of the flag. You are able to carry out changes in flags here.
Note: By default, there is a white flag which cannot be deleted but you can edit it.
Path: Settings >> Module Properties >> Flag.

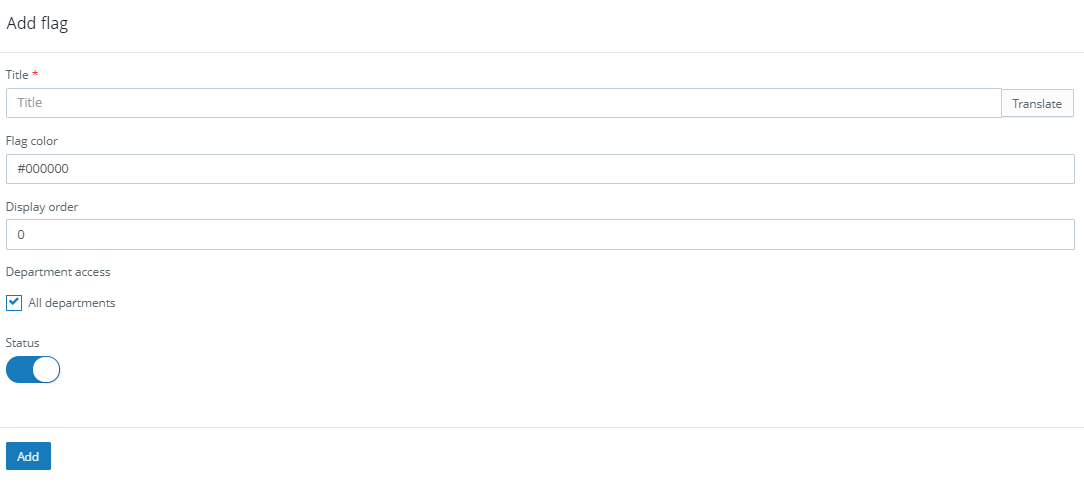
Add flag
Title: The name of the flag should be specified here.
Flag color: The color for the given flag can be set from here.
Display order: If there are many flags available then sorting for the flag listing can be done from display order. Flags get sorted as per the display order for the flag that is specified.
Department access: It consists of departments that will have access to a particular flag. More than one department can be selected at a time. It is also possible to select all the departments using all departments option.
Status: It is possible to enable and disable a particular flag from here.
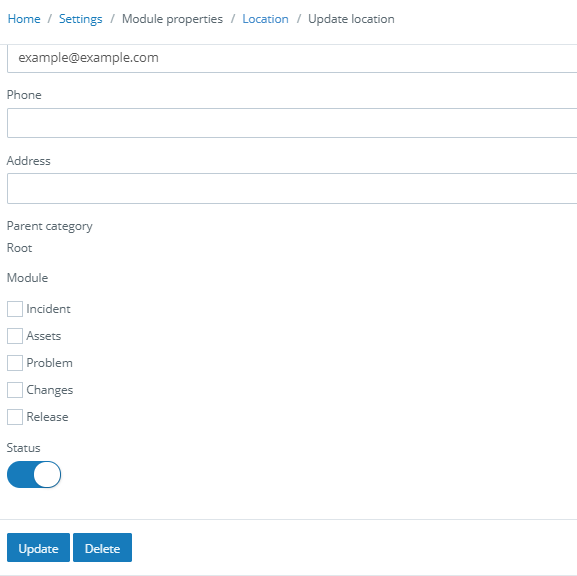
Location : You can add different locations domain wise for different modules.
You can select for which module you want to add the location i.e. incident, asset, problem,change or releases.
Path: Setting >> Module Properties >> Location.


Steps to add location -
Add: Click on add button to add the location.
Steps to delete a location :
Click on the location which you want to delete and here at the bottom you will get delete button.
You cannot delete root.
Impact
The impact is a measure of the effect of an incident, problem, or change on business processes. Impact is often based on how service levels will be affected.
You can add impact like impacts business, user or a group, etc. You can also link for which module you want to add impact say Incident, change, problem, assets.
This is an optional field. You can also disable this field.
Path: System settings >>Module Properties>> Impact.

Steps to add Impact:
Title: Here you can add the title for Impact.
Color: Here you can add color for impact.
Description: Here you can add a short note for impact.
Display order: If you have added multiple impact and you want them to be arranged in specific sequence then you can use display order.
Module: Here you can specify module access.
Status: You can enable or disable an impact from here
Add: Once you click on add, the new department will be added to the system.


A risk is defined as uncertainty of outcome; it can be an opportunity or a threat
You can add a list of risk levels associated with change so that you can then have backout plan available in case something doesn’t work as planned.
Path: Settings >> Module Properties >> Risk.
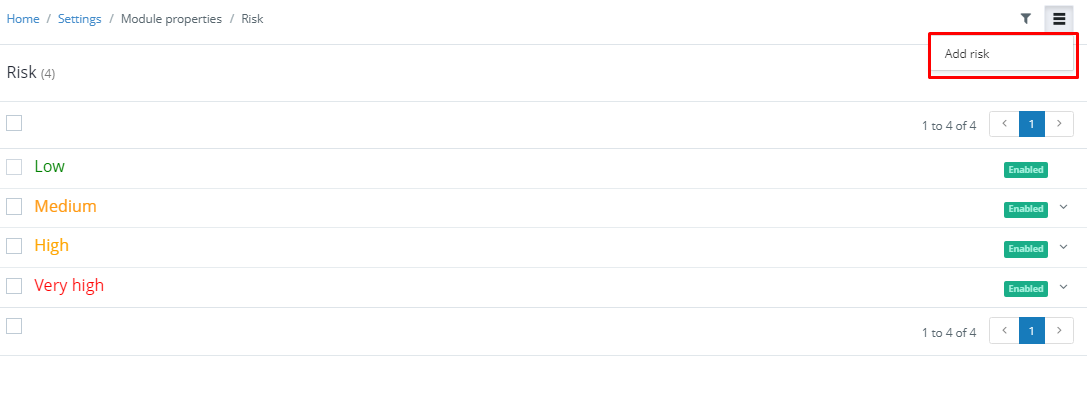
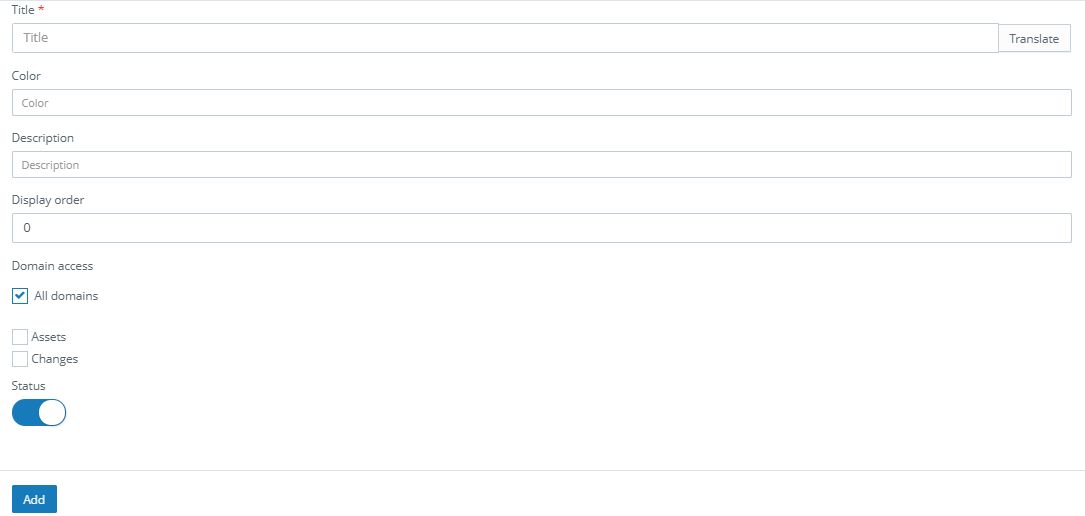
To Add Risk:
Title: Here you can add a title for risk.
Color: Here you can add color for risk.
Description: Here you can add a short description for risk.
Display order: If you have added multiple risks and you want them to be arranged in specific sequence then you can use display order.
Domain access: Here you can specify domain access.
Status: You can enable or disable a risk from here
Add: Once you click on add, the new department will be added to the system.
Change Type ・
Changes can be of different types based on the complexity of change.
You can add a list of change type like Standard, Emergency ,normal etc.
Standard: a pre-authorized change that is low risk, relatively common, and follows a procedure or work instruction
Emergency: A change that must be implemented as soon as possible, for example, to resolve a major Incident or implement a security patch.
Normal: Any service change that is not a Standard or Emergency Change.

Settings >> Module settings >> Change type
Mass Action on Change type:
It is possible to select either of the change type or more than one change type with the help of checklist and perform the desired action on them. The change type can be either enabled or disabled.
Any change type can be deleted using the delete option except the default change type.
You can also edit the existing change types.
Apply Filter:
Filter list is used to provide more efficient and effective searches.
You can filter based on title and enabled or disabled option.
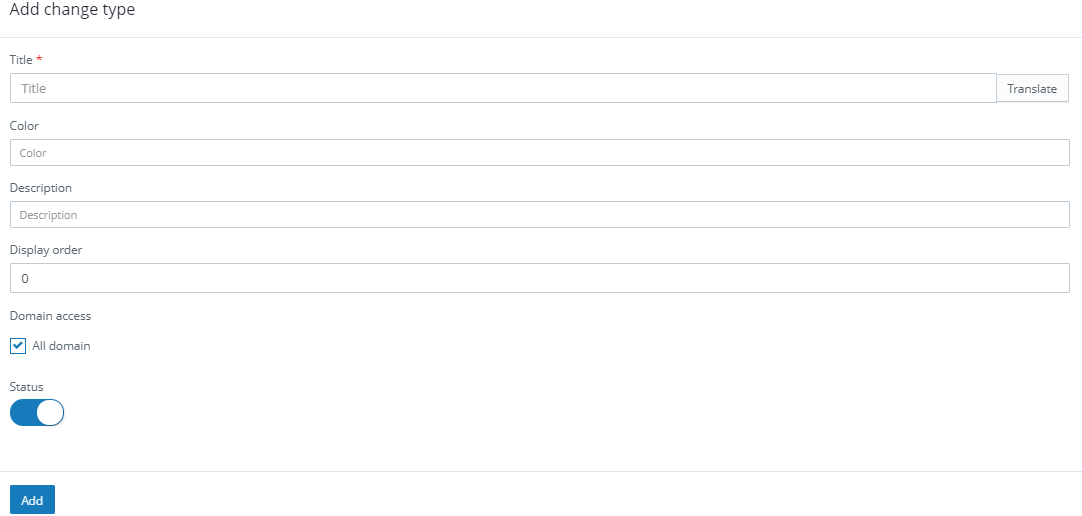
Steps to add a change type :
Title - Here you can add title for change type.
Color - You can define color for change type.
Description - Here you can add a short description for change type.
Display order - If you have added multiple change type and you want them to be added in specific sequence then it can be done using display order.
Domain access - Here you can specify domain access for change type.
Status - You can enable or disable a change type from here.
Release Type ・You can configure release type here like whether its a build plan or test plan.
Path: Settings >> Module settings >> Release type

Mass Action on Release type:
It is possible to select either of the release type or more than one release type with the help of checklist and perform the desired action on them. The release type can be either enabled or disabled.
Any release type can be deleted using the delete option except the default change type.
You can also edit the existing release types.
Apply Filter:
Filter list is used to provide more efficient and effective searches.
You can filter based on title and enabled or disabled option.
Steps to add the release type :
Title - Here you can define title for release type.
Color - You can define color for release type.
Description - You can add a short description for the release type.
Display order - If you have multiple release type added and you want to add them in a sequence then you can use display order which will add the release type in particular sequence.
Domain access - Here you can add domain access.
Status - You can enable or disable a release type from here.
Add : Once you click on add, the new department will be added to the system.
Service category :Service Category is a comprehensive list of IT Services and the Business Services provided by the IT department to the end-users.
You can add various service categories like Hardware,Software,service etc.
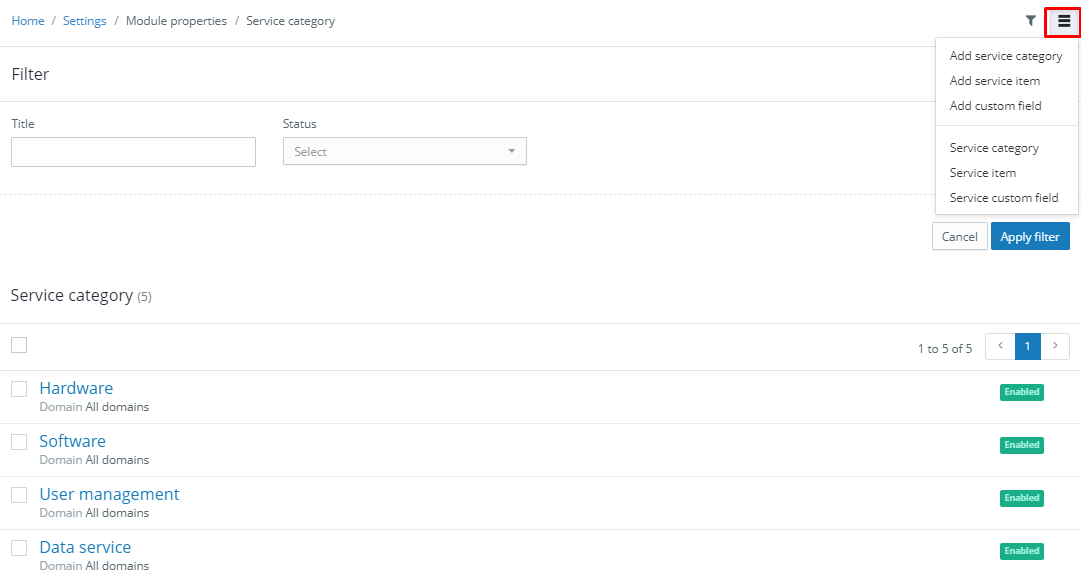
Path: Settings >> Module settings >> Service Category
Mass Action on Release type:
It is possible to select either of the service category or more than one service category with the help of checklist and perform the desired action on them. The release type can be either enabled or disabled.
Any release type can be deleted using the delete option except the default service category.
You can also edit the existing service category.
Apply Filter:
Filter list is used to provide more efficient and effective searches.
You can filter based on title and enabled or disabled option.
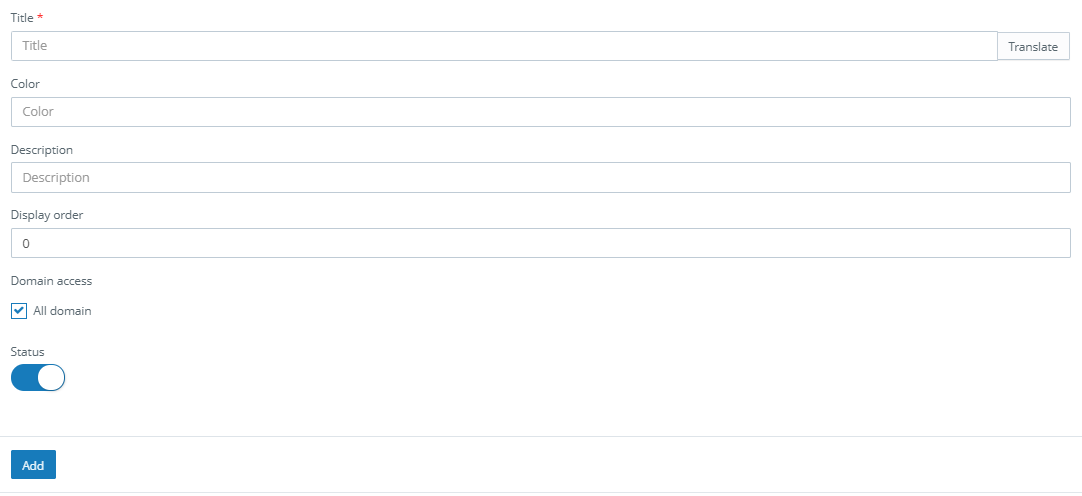
Steps to add a service category :
Domain access :Here you can select the domain access.
Title : Here you can define title for service category.
Description:You can add a short description for the service category.
Status :You can enable or disable a service category from here.
Add : Once you click on add, the new department will be added to the system.
Steps to add the General ledger :

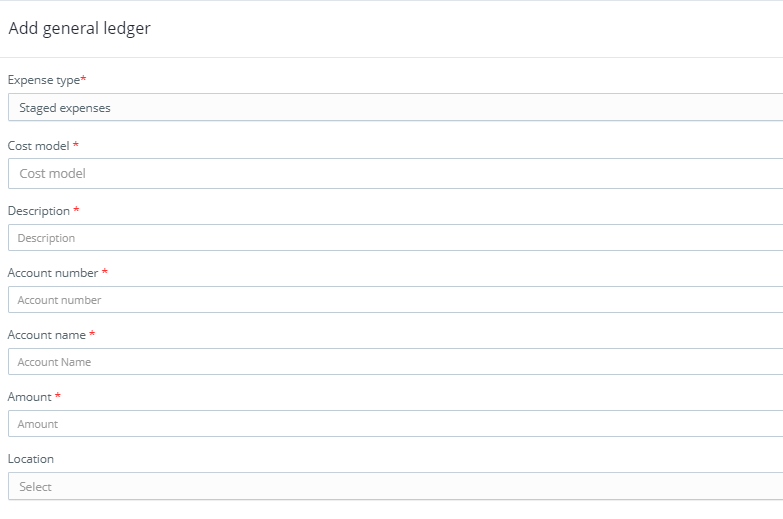
Expense type : You can select the expense type like Staged,cleaned,groomed expenses from the drop down.
Cost model : You can specify cost model here.
Description: You can specify description here.
Account number : You can specify account number here.
Account name : You can specify account name here.
Amount: You can specify amount here.
Location : You can specify location here.
Add : You can click on add button to create a general ledger.
You can also import general ledger using a CSV file and export the general ledger.

Urgency ・You can define Urgency for Incidents like high,medium ,low to help us identify the severity level of incident.
This is a optional field. You can also disable this field from System settings >Module>> Incident module.
Note : You can enable urgency field to be displayed on manage or client portal from System settings >Module>> Incident module.
Settings >> Module settings >> Urgency
Mass Action on Urgency :
It is possible to select either of the urgency or more than one urgency with the help of checklist and perform the desired action on them. The urgency can be either enabled or disabled.
Any release type can be deleted using the delete option except the default urgency.
You can also edit the existing urgency .
Apply Filter:
Filter list is used to provide more efficient and effective searches.
You can filter based on title and enabled or disabled option.

Steps for adding urgency :
Title : Here you can add title for urgency.
Display order :
Color : You can define color for Urgency.
Access : You can define below access type -
Public : When public access is selected then it will be visible to both staff and the clients.
Private access : When private access is selected then it will be visible to only staff.
Module access : Here you can define module access.
Status : You can enable or disable particular urgency from here.